
To get a general introduction to Channels, what they are and how they work, please see this guide: https://help.herodesk.io/en/10-introduction-to-channels
To set up a new email channel, go to:
- Settings
- Channels -> Add Channel
- Email -> Start setup
Connect the email address
You will see this screen:
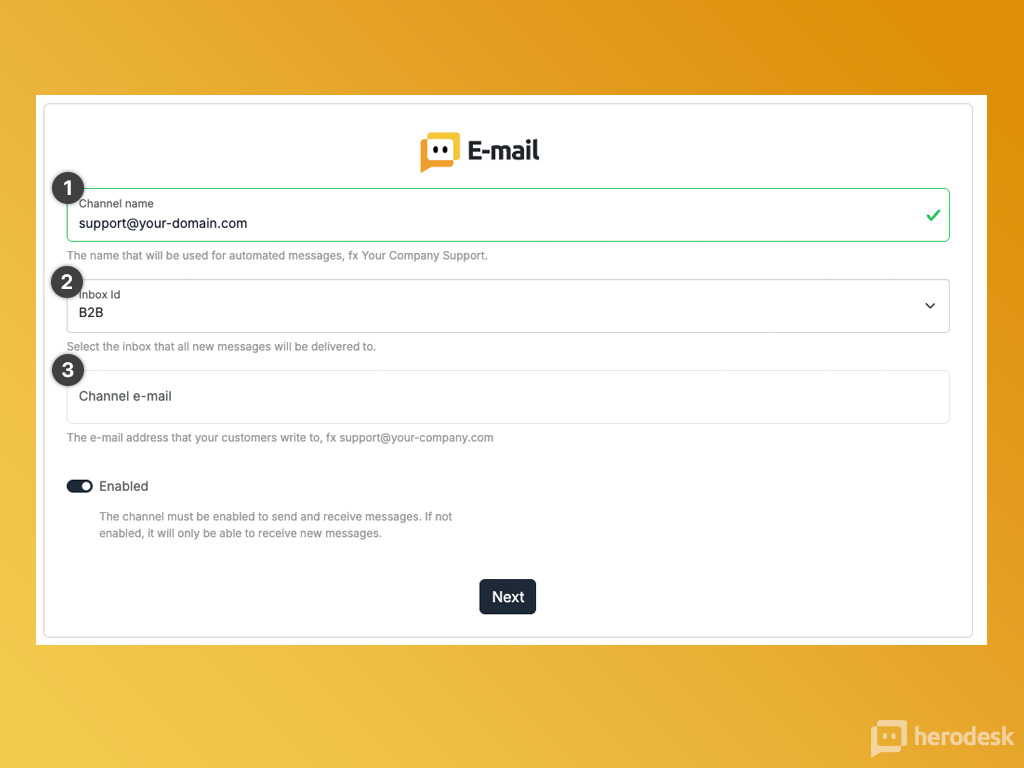
Channel name (1) is an internal name that you can use to identify the channel. We usually recommend entering the email address you want to connect to Herodesk here.
Inbox (2) is where the messages will be delivered in Herodesk.
If you need help setting up your inboxes, please see the articles here: https://help.herodesk.io/en/c/4-inboxes
Channel email (3) is the email address you want to connect to Herodesk. Enter that email address in this field.
Note that we do not support public email providers such as @gmail.com, @outlook.com, etc. - it must be an email address on your own domain name.
When you click "Next," we will send an email to your email address containing a link you must click to verify its ownership.
Get emails into Herodesk
Once you have verified the ownership of the email address, you will see this screen:
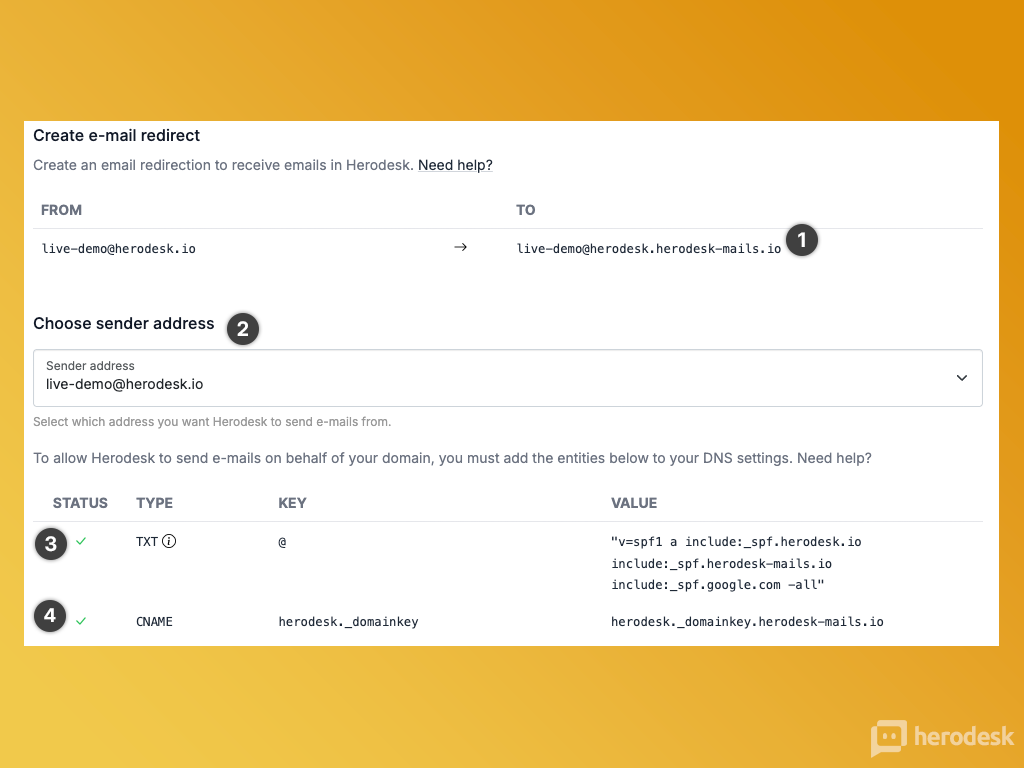
To have emails delivered to your Herodesk, you must set up an email forwarder from your mail provider to Herodesk.
The email address seen in (1) is the address to which you must forward your emails to.
All mails that are delivered to this email address will be imported as a message in your Herodesk.
Send email from your domain name
By default, Herodesk will send emails from the auto-generated system address. This is to ensure deliverability.
However, if you are on a paid plan, you can choose the sender address (2) to be your own email address.
If you do so, you must authorise our servers to send emails on behalf of your domain.
To do this, you must do two things.
- Add include:_spf.herodesk-mails.io to your SPF record (3)
- Create a new CNAME record as described in Herodesk (4)
Once done, you are ready to receive emails from your customers in Herodesk and reply them using your own email address as sender.
If you want to test Herodesk before setting up email forwarders and DNS changes, you can send an email directly to the auto-generated system address shown in your control panel.