
To get a general introduction to Channels, what they are and how they work, please see this guide: https://help.herodesk.io/en/10-introduction-to-channels
To set up a new email channel, go to:
- Settings
- Channels -> Add Channel
- Facebook Messenger -> Start setup
Connect to Facebook Messenger
When opening the installer, you are met by this screen:
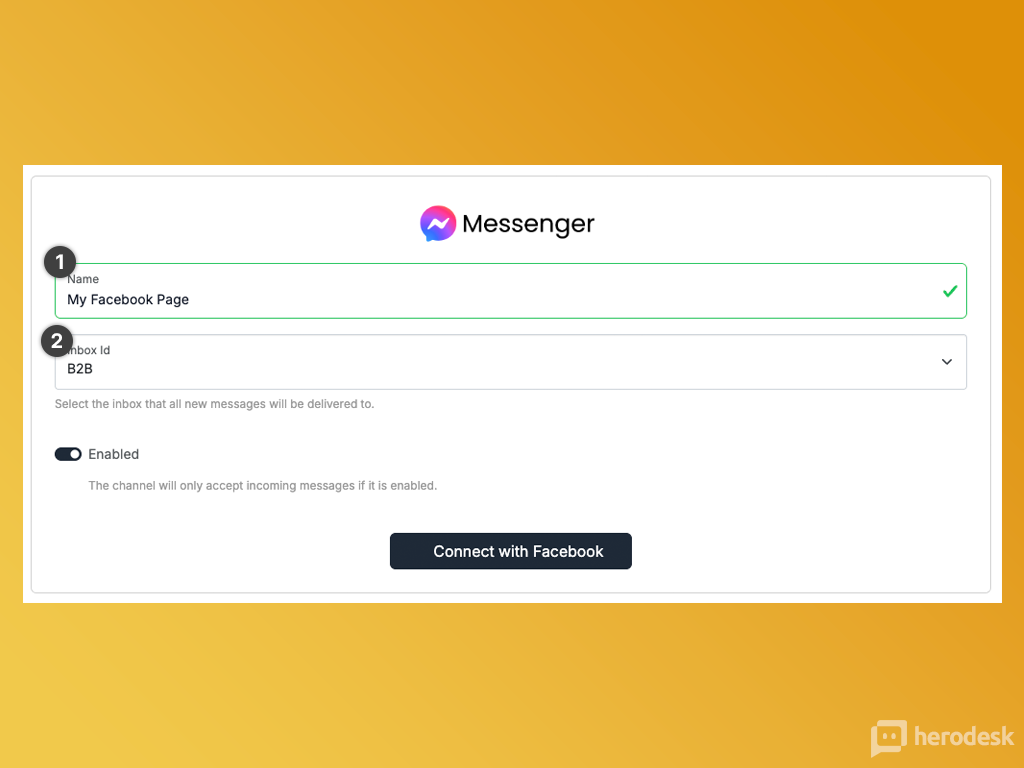
The Name (1) is an internal display name for you to be able to distinguish multiple Facebook pages from each other. Enter a name you find suitable.
Next, choose the Inbox (2) where you want the messages from your Facebook Messenger to be delivered.
When you click "Connect with Facebook", you will be redirected to Facebook.com to authenticate.
You must sign in with a personal account that is an administrator on the Business Manager that the Facebook Page is associated with.
During the authentication with Facebook, check the relevant Facebook business manager. Then select all the Facebook Pages you plan on adding to Herodesk.
By doing so with the first channel you add, you can simply "reuse settings" when authenticating for the next Facebook Messenger pages you wish to associate with Herodesk.
Once you have completed the authentication, you will be redirected back to Herodesk.
If you only selected one Facebook page, you're done now and it's all set up.
If you selected multiple Faecbook pages during the authentication, a new dropdown will show, where you have to select the Facebook page you want to associate with this channel, and press "Save Changes". Once done, you're ready to go.
Repeat this process for each Facebook page you wish to associate with your Herodesk account.