
Before you start setting up an email forwarder, you have to make sure you have administrator access in Office 365. Otherwise, you won't be able to make the necessary change.
When setting up an email forwarder in Office 365, two things need to be done:
1. Set up the email forwarder
2. Allow external forwarding by changing anti-spam policies
The following will guide you through setting up a forwarder to redirect emails from your current email address to Herodesk.
Set up email forwarder
1. Log in to the Admin Center
-> Go to: https://admin.microsoft.com
2.
Go to "Active users"
-> In the left-hand menu, click on "Users" > "Active users"
3. Find the user you want to set up forwarding for
-> Use the search bar or scroll through the list to find the user. Click on their name
4. Open Mail Settings
-> In the user details panel, scroll down to the "Mail" section and click on "Email forwarding"
5. Enable forwarding
-> Enable "Forward all emails sent to this mailbox" to On
-> Enter the email address you want to forward messages to
-> This email system address is specified in Herodesk under your email channel
->(Optional) Check "Keep a copy of forwarded email in this mailbox" if you'd like to retain copies in the original inbox
6. Save changes - click "Save" at the bottom
Change anti-spam policies for forwarding
External email forwarding is disabled by default in Microsoft 365. The reason that external forwarding is disabled is from a security perspective.
To allow external forwarding you will need to change an Anti-Spam policy in Microsoft 365 Defender. You can enable it for all users or create a new policy to only allow it for specific users.
Allow External Email Forwarding for all Users
Make sure that you have admin permission in Microsoft 365 before you proceed.
1. Open Microsoft 365 Defender
-> The anti-spam policies are located in Microsoft 365 Defender
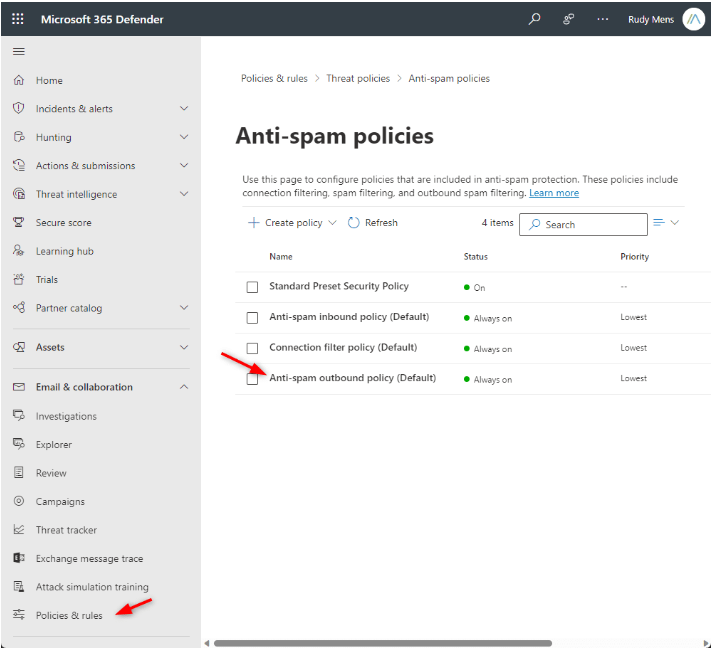
2. Open the Anti-Spam outbound Policy
-> Open Policies & Rules (under Email & collaboration)
-> Select Threat Policies > Anti-spam policies, and open the Anti-spam outbound policy
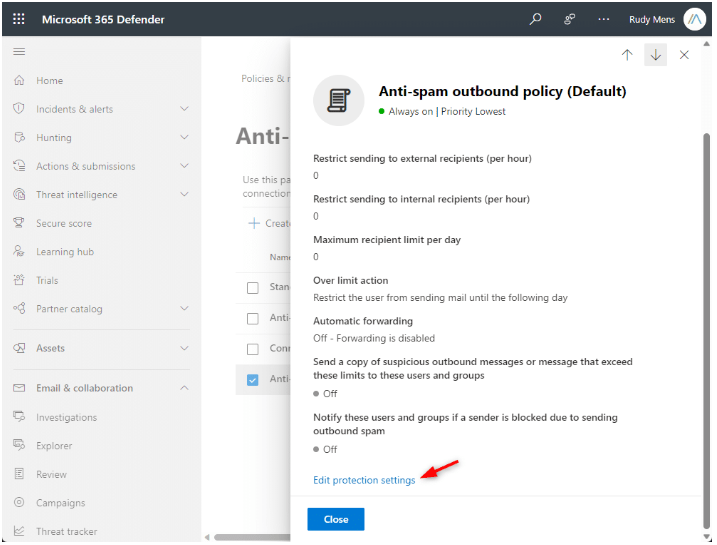
3. Edit the policy
-> Click on Edit Protection Settings
4. Enable Forwarding
-> Under Automatic forwarding rules -> select On – Forwarding is enabled
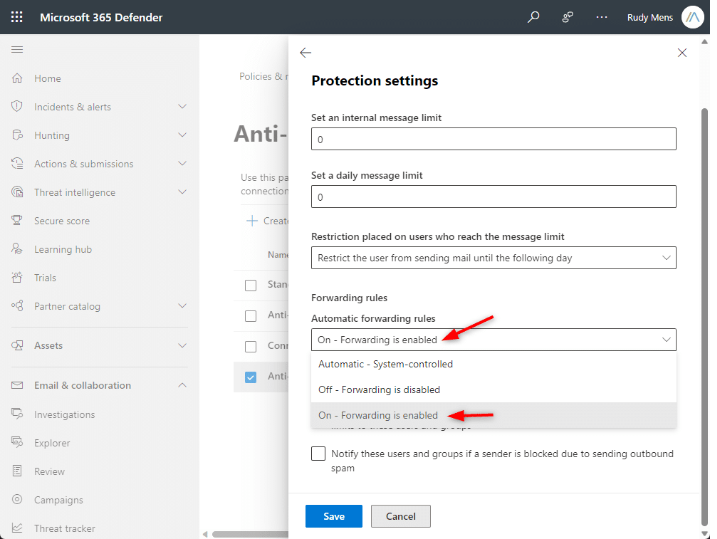
5. Save and Close the Policy
-> Click on Save and close the policy rule
-> Forwarding to External email for all users are now be enabled