
Herodesk live chats are added to your website, to let your users or visitors chat directly with you and your team on your website.
Herodesk Basic and Herodesk Plus customers can create as many live chat channels as needed.
We recommend that you create one live chat channel for each brand, site, or language, just as you may have different support e-mail addresses for each of your brands or languages.
There are a number of reasons why this is recommended:
- One live chat channel is connected to one Inbox in Herodesk
- This affects fx auto-translate of chats
- Welcome- and offline messages are defined per live chat channel
- You might for example want different messages for different brands
Create new live chat channel
To create a new Live chat channel in Herodesk, go to Settings -> Channels and select "Add Channel". Select Live chat.
The only required field is the Display name. The Display name is an internal name for your live chat that you can use to identify it. It could be the domain name of the website where your live chat will be added.
Scroll to the bottom and click "Save Live chat".
Add the live chat to your website
At the top, you'll see a button labelled "Installation code".
Click that. This will show the following pop-up:
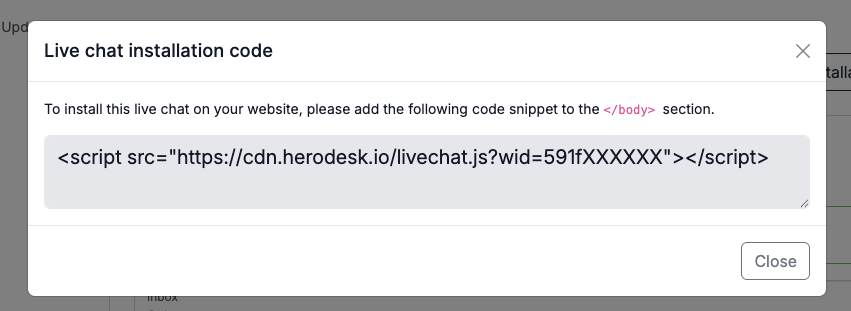
To add the live chat to your website, copy the <script> tag and add it to your websites source code.
It differes for each CMS how to do this. In general, look for your theme/design editor and find either the place to add custom scripts or modify your theme file.
In either case, add the full <script> tag from the pop-up as close to </body> as possible.
Personalise your live chat
Each live chat has several options and settings that let you personalise its look, feel, and behaviour.
Most are self-explanatory, but here are a few tips to help you give your customers the best experience.
Require the customer's email address
You can choose to "Require Email", which will require your visitors to enter their email address before they can send a new chat message to you.
This has two advantages.
First, if we know the email address, Herodesk can immediately do an order lookup, etc., using Widgets, so you have all the relevant details about the customer ready from the start.
Second, if the customer leaves your website before you reply or if it takes you more than 10 minutes to reply, your reply will automatically be sent to the live chat and the customer's email. This helps ensure that a customer never misses your reply, even if they leave your website or it takes you some time to get back to them.
Add an FAQ to your live chat
Customers often ask the same (or at least similar) question. It could be about delivery time, how to return an item, the payment terms or other frequently asked questions.
Herodesk Help Centers lets you create FAQs with the most frequently asked questions and answers.
In your Live chat settings, you can select one of these FAQs to be displayed in your Live chat.
When a visitor opens the chat, they are greeted with questions from your FAQ. When clicking one, the answer appears, as if it were a written message.
The visitor can continue to view your FAQs in this manner, and a conversation in Herodesk is only created when they type in and send a message manually.
This can help customers find answers to your FAQs quickly and easily.